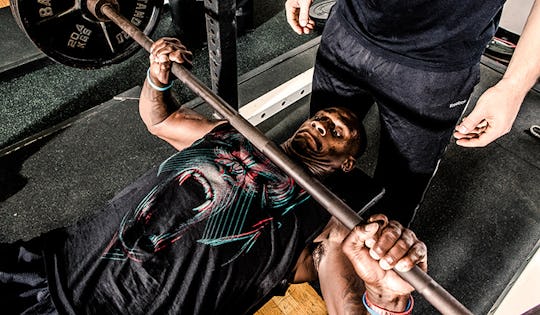
The barbell bench press may just be the most popular conventional barbell exercise. When someone asks how much you lift, they are more than likely asking you how much you bench. However, despite the popularity of the bench press, technical errors when performing this exercise are almost just as common.
It’s important to first recognize the barbell bench press for what it is. It is not just a “chest” exercise. Despite what is commonly thought, the bench press is a full-body strength exercise that builds strength and stability through a horizontal pressing motion. It is a compound lift that helps target the whole nervous system when being performed properly. Therefore, it is imperative that technique is prioritized.
The Simple Set Up
There is a lot of misconception about how to set up for a solid bench press. If you have ever been to a commercial gym, it is likely you have seen many different variations: feet up on the bench, feet on the ground, elbows flared, elbows tucked tight, wrists bent, wrists straight, head on the bench, head off the bench, etc.
When specifically discussing athletes, it is important to remember that orthopedic safety and lower risk exercising is important to ensure the well-being of the athlete. We will discuss how to set up for the bench press so that we can utilize strength effectively while also making sure that we are in safe joint positions and a low-risk training environment.
![Onnit Tplus]() Barbell Bench Press Tip #1: Leg Position
Barbell Bench Press Tip #1: Leg Position
The barbell bench press is an observable upper body movement. However, the legs should very much be involved if optimal strength is to be exhibited.
The feet and legs can help build torque and stability from the lower body which can provide a better overall structure for the press.
The leg position is often referred to as a “leg tuck” and it is relatively easy to set.
Start by lying on the bench with your feet on the bench and hands around the barbell. Scoot yourself backwards on the bench until your ears are off the bench.
From here, place your feet flat on the ground and then use your grip on the bar to pull your head back onto the bench.
The “leg tuck” is now set and your feet should be flat on the floor with a stable hip position locked into place.
Barbell Bench Press Tip #2: Shoulder Position
From here, the next step is to retract your shoulder blades which will cause your chest to rise slightly off the bench. This will help shorten the total range of motion of the lift in a more optimal shoulder-locked position to allow for less risk of shoulder aggravation during the press. Make sure that the shoulders are also depressed and not shrugging up towards your ears.
Barbell Bench Press Tip #3: Wrist Position
To allow for greatest mechanical advantage at the wrist, the wrists should be kept straight so that the bar is right in line with structure of the forearm. Having the wrists bent backwards puts the bar in an awkward position over the wrist, elongating the lever arm and putting more mechanical stress on the wrist and arm.
This will negatively affect the stability (and therefore performance) of the press. The wrists should also not be bent too far forwards as this will risk losing your grip and dropping the bar. A straight position with the bar balanced over the forearm is what is advised.
Barbell Bench Press Tip #4: Head Position
All too often we see people who lift their heads off the bench, especially during the lowering of the bar. When this happens, the total spinal structure is thrown off and, consequently, the whole body stability. The common term is known as the “one-joint rule” and it refers to how the spine should be organized when performing lifting maneuvers.
To allow for safety and stability, the spine should be organized such that it is locked into a straight-line position from your tail bone all the way to your skull. Lifting your head off the bench results in a loss of the “one-joint” which will result in less force developing potential. The head should remain flat on the bench from the set up all the way until the bar is racked again.
Performing the Press
Barbell Bench Press Tip #5: Un-racking the Bar
Once your set up is in place, it is important to un-rack the bar properly so as to not negatively affect your subsequent press. The grip should be tight around the bar and the elbows set into a tucked position by “screwing in” your hands to the bar. When lifting the bar out of the rack, be sure to engage the lats and think about pulling the bar out of the rack towards your chest rather than pressing up and out.
By trying to lift up and out, you may take your shoulders out of position and ruin the entire set-up. Thus, it is suggested that the bar be initially placed at a height that will allow you to retract your shoulder blades and pull the bar out of the rack rather than press it out of the rack. Once un-racked, the bar should be set over the line directly under the pecs. This is to prepare for a natural shoulder pressing movement.
Barbell Bench Press Tip #6: Lowering the Bar
With the bar set just under the pecs, the bar should be lowered under control until it touches the space directly below the pecs. Lowering the bar under control is critical for safety reasons and will also help to really “own” the movement. Dropping the bar with the assistance of gravity can lead to an unpredictable outcome.
The elbows should not be too flared nor too tucked. Too much of a flair can cause impingement at the shoulder and too much of a tuck can cause an over-reliance on the triceps to perform the press. The elbows should be at approximately 45 degrees from the ribs as the bar is being lowered. As previously discussed, the head should remain on the bench.
Barbell Bench Press Tip #7: The Press
A lot of people have a tendency to flare the elbows out upon pressing the weight from the bottom of the chest. A good bench press will look almost exactly the same on the way up as it did on the way down. Flaring the elbows during the press will reduce the torque and strength of the lift. Be sure to maintain your elbow and wrist position during the press.
The feet should screw into the floor during the press to add leg drive to the lift; but it is imperative that this not result in lifting the hips off of the bench. This puts the lower back in a very compromised position. The over-arching and hips coming off the bench is typically due to people thinking about pushing the bar away from them.
If you instead think about pushing yourself into the bench, it will help keep a good spine position and keep the hips on the bench. Lock the elbows out fully before placing the bar back onto the rack.
Bonus Barbell Tip: Breathing and Bracing Throughout the Press
Before the bar leaves the rack, it’s important to make sure an initial breath is taken to set the brace. Breathing should be diaphragmatic, meaning that the breath should come from the belly rather than the chest. The abdomen should be braced – it should be a similar feeling to the way you brace your abdomen when you are about the get punched in the stomach.
When un-racking the bar, the brace should be set and a deep breath should be taken in and held as the bar is removed from the rack. Once the bar settles over the chest, the athlete should exhale slightly before initiating a second, deeper breath to prepare for the press.
The breath should be held as the bar is lowered to the chest, and kept held during the initial press off the chest. Once the weight is being locked out, the athlete will exhale before placing the bar back on the rack. If multiple repetitions are being performed, the breath is reset before all subsequent repetitions.


)


