Let’s face it, we are all busy and only have a finite number of minutes in the day that we can dedicate to ourselves, so making things count is very important.
As a reader of The Optimized Life your health and fitness is obviously a high priority, and implementing the best bang for your buck training program is essential.
You read articles, watch videos, define your goals, choose your equipment and training environment and then construct your plan of attack based on these factors.
Olympic lifts for power development; push ups, pull ups, squats and deadlifts for strength and muscle development; kettlebells, steel maces, and sandbags to keep the cardiovascular system primed and ready.
With so many training options available, it is hard to imagine adding anything else on top of the pile without it toppling over!
However, without injecting mobility work into your program you could be doing yourself a great disservice down the road. Generally, the more we train, the harder we play.
The longer we neglect imbalances of our bodies, the greater the chance we have for them to snowball into an avalanche of future nagging injuries and potential downtime from doing the things we enjoy.
Adding some mobility work into your program will help you avoid these future injuries, take care of the ones that linger around now, and, quite possibly, move better than you have in a long time.
Mobility work is essential because it encompasses so many different physical attributes.
Unlike the definition of flexibility which primarily refers to statically stretching a muscle at its end range; mobility deals with joints, muscles, fascia, and other connective tissue and how they coordinate and relate to each other through a range of motion.
Our bodies have a magnificent ability to move freely in almost any desirable direction, and with some added mobility training you will be able to train your body to move with ease.
By gaining a better quality of movement you can improve your overall strength and conditioning goals.
I am going to give you an overview of mobility training, some examples you can use right away, and teach you how to simply add it into your program without adding more time that you can’t afford to spare.
Mobility Training, Do You Need It?
First things first, do you even need mobility training? From my years of training experience the answer is most often, YES. Life takes a toll on our bodies and it does so in an asymmetrical fashion, meaning that the stresses put on our bodies are not the same on each side.
Different levels of joint alignment and tension in the tissue between sides commonly occur through the numerous ways we place physical stress on the body from work, sports, travel, etc.; they all have an effect.
Because of these factors, most people I train exhibit some symptom that indicates a mobility issue and requires addressing through an appropriate training protocol.
Some symptoms include pain (either in a dull static state or while performing a movement), joint and/or muscle tightness, and weakness or movement compensation while working through a range of motion.
Generally, the three most common areas needing attention are the ankles, hips, and shoulders. To see if you need either one of these areas mobilized try these simple tests.
Mobility Training Test for the Ankles And Hips
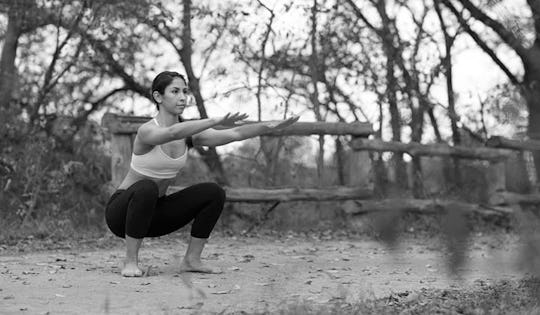
I like the simple bodyweight squat test to see if you can get your butt to your calves comfortably while maintain an equal foot position and keeping your heels on the ground. If your heels pop up the lower you go, chances are that your ankle mobility is limited.
If you cannot get to depth, if your knees are caving in, or if there is a sensation of tightness in the joints or muscles while in the bottom position, your hips could use some mobility work as well.
Mobility Training Test for the Shoulders
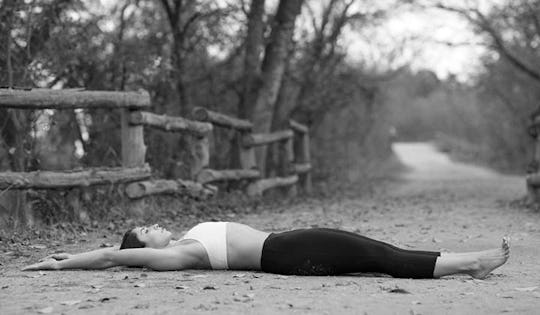
Simply lie on a table or floor with your arms by your side and thumbs up. From there, bring your arms slowly overhead. Are they able to touch the surface behind you? Are you arching your back in order to make them do so?
Are one or both arms off the surface? If so, you have some shoulder mobility work to do.
Mobility Training Test for the Hips
You can sit on the ground with your knees bent and arms behind you for sup- port. Drop your knees to one side of your body and make a mental note of how they lay on the side and how your body feels. Repeat on the other side doing the same thing.
Chances are that your hips do not lay the same way on each side, meaning that one side is more restricted than the other.
For those of you who passed these tests with flying colors (meaning that you are equal on both sides), congratulations! You have above-average mobility. However, this does not mean you should ignore the concept and strictly focus on your lifting or your sport.
Like I mentioned above, mobility is movement specific where one position might have you flowing freely but by changing your body position ever so slightly you may find that you hit a wall or find yourself losing your balance; you will be best served if you explore movement in these areas that are not as comfortable for you.
As a side note, I have seen athletes that are hyper-mobile in a particular joint, and when they sneeze too hard their shoulder will briefly shift out of place. In these areas, mobility should not be addressed and a proper strength and stability protocol should be implemented.
Even with these people, I have not worked with anyone who was hyper-mobile in all of their movements, therefore, they too can work on their mobility where they are inhibited.
How to Mobilize
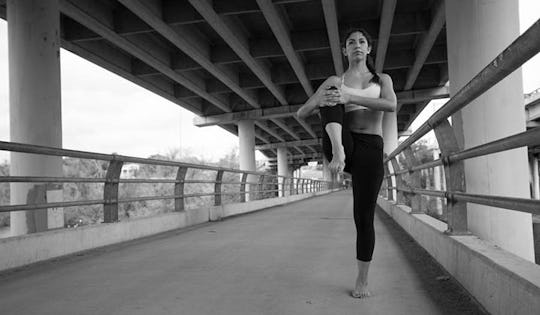
I classify mobility into two categories: General and Specific. General Mobility is your basic mobility that covers the whole body and accesses a mild movement of joints to get them primed for bigger movements.
I use a general mobility protocol with all of my athletes that cover the major joints, head- to-toe, and act like a warm up before their training session begins.
I like to start with the head and work slow, isolating and increasing the range of motion movements. I move down to shoulder rotations, thoracic mobility, hips, knees, and ankles.
Again, this is simply a warm up to get the joints lubricated and our movement primed before we tackle our training session.
Specific mobility is based off of our movement assessment where we find areas of limitation which could stifle our performance and lead to injury down the road. Specific mobility requires a direct change to the movement pattern by addressing the joints and all of the tissues affecting the dysfunctional movement pattern.
I talked about the big three earlier in the article and these are the most commonly prescribed specific mobility training exercises I implement in their programs. For any of the specific mobility protocols you are looking to move the body through a range of motion that is inhibited.
You want to move slowly, to feel the movement and minimize any balance issues that can occur due to tight muscles or joints. Also, you want to lightly traction the major joint you are trying to move with. This traction component is unique to enhanced mobility.
When performing an exercise like a squat it is not advisable to actively think about pulling the hips out of the sockets. This can cause instability and potential injury.
However, when specifically targeting the hips to enhance mobility you want to think about lightly tractioning the joint to increase its mobility.
All of the specific mobility exercises I use incorporate solely the athletes’ bodyweight or very light weight to help facilitate movement and enhance traction.
You can use the squat as a mobility exercise by dropping into the bottom position and gently moving the hips around to mobilize the joint. You can also take a light weight, like a kettlebell, and increase your mobility.
Inserting Mobility Training Into Your Program
The general mobility protocol will go a long way to enhance your training and it will only add a few minutes to your session. I like to have my athletes perform it right before their lifting as a warm up. You can also simply do it when you have the time or when you feel you need to.
There are mornings where I wake up a little stiff and the general mobility drills get me feeling much better and ready to start the day. You can also do them before bed if you know you had a long day full of training, sports, work stress etc.
Taking a preventative approach can facilitate a good nights’ sleep and have you recovered for the next day.
Specific mobility training does call for more time and effort and requires a specific program that you must be committed to in order to fix your mobility. After your assessments, define what you need to work on most.
Next I would choose 1-2 movements that help correct areas of immobility and, lastly, decide when you are dedicating the time to do it.
Some options include having a dedicated training day to mobility. It might be in the middle of the week when you need an active recovery type workout; you can construct and perform a 20-30 minute mobility routine.
Another way is to add some time to your warm up. If you are on a tight training time table you may have to substitute those tricep kickbacks for some shoulder mobility. Dedicate your first one to two exercises to mobility drills before you go straight to the squat rack.
Lastly, the way I perform most of my mobility work is to do it in between sets. If I am doing deadlifts on a particular training day I like to rest between sets doing some shoulder mobility drills.
Likewise, if you are doing pull ups, add some hip and ankle mobility in between while resting up for your next set.
Take note that I advise that the joints I am trying to mobilize not be a paired exercises that require those joints as well. I would not do pull ups and shoulder mobilization drills in between. This can make the joint and muscles too lax and could lead to potential injury.
Adding some mobility training into a structured strength and conditioning program will enhance your ability to move better and perform at your best. Now go out and make it happen.




)


