Summary
– The posterior chain is the collective term for the muscles on the backside of the body that are the main drivers of explosive power.
– The posterior chain includes the glutes, hamstrings, and lower back, but also muscles of the upper body and core.
– Due to imbalanced training, the posterior chain is often weak in relation to muscles on the front of the body, especially the quads.
– Targeting the glutes and hamstrings with different exercises for power, strength, and muscle size will develop the posterior chain as a whole and build athleticism, as well as help to prevent injury.

5 Posterior Chain Exercises For Stability And Strength
What you can’t see can hurt you. Or, it can take your strength, muscle gains, and athletic performance to the next level.
What you can’t see, at least not without contorting in front of the mirror, are all the muscles on the backside of your body. The glutes, hamstrings, spinal erectors (lower back), lats, and a handful of other key movers. Collectively, these are known as the posterior chain.
Developing the pecs, abs, and biceps—aka, the “beach muscles”—might make you look good (at least from the front), but it’s the muscles on your backside that are most responsible for producing power, helping you dominate in sports and in the gym, and keeping you injury-free.
“On the front of the body are the ‘show’ muscles,” says Jim Smith, CPPS, a strength coach and owner of Diesel Strength & Conditioning (Dieselsc.com). “The posterior chain is the ‘go’ muscles.”
If you’re currently dedicating more time and intensity to your pecs and abs than your glutes and hams, it’s time to start focusing more on your rearview. This article provides a simple yet thorough guide to exactly why and how to train your posterior chain for better gains, better performance, and a better overall physique.
What is the Posterior Chain?
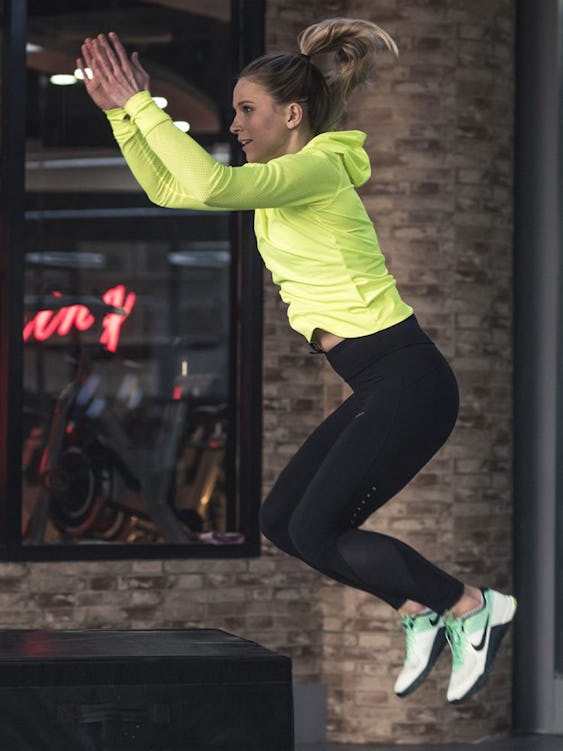
Some confusion exists as to what exactly constitutes the posterior chain. The glutes, hamstrings, and lower back muscles are the centerpieces, and represent the musculature most trainers are referring to when they use the term posterior chain. But it doesn’t stop there.
“There’s more back there than hamstrings and glutes,” says Jeff Jucha, owner and head coach at West Little Rock CrossFit in Arkansas (westlittlerockcrossfit.com). “The traps, lats, and other muscles along the spine are also part of the posterior chain.”
Smith adds a few more muscles to the count, including the adductors (which span from the front of the thigh to the rear), calves, and core musculature (not including the rectus abdominis, your six-pack muscle, which is obviously on your front). But basically, he says, “When you look in the mirror, [the posterior chain is] all the muscles you can’t see.”
Major Posterior Chain Muscles
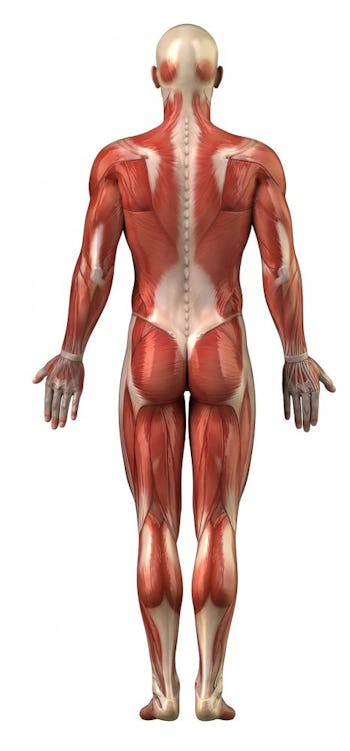
– Upper, middle, and lower trapezius
– Posterior deltoids
– Latissimus dorsi
– Rhomboids
– Spinal erectors (erector spinae)
– Transverse abdominis
– Gluteus maximus, gluteus medius
– Hamstrings (biceps femoris, semimembranosis, semitendonosis)
– Calves (gastrocnemius, soleus)
The reason it’s called a “chain” is because these muscles all work together to create movement.
“The posterior chain works synergistically to propel the body forward, perform reactive agility, and initiate throwing, jumping, sprinting, acceleration, and deceleration of athletic movements,” says Smith. “The fancy term for how they work together is ‘intermuscular coordination.’”
Why is Working Out the Posterior Chain Important?
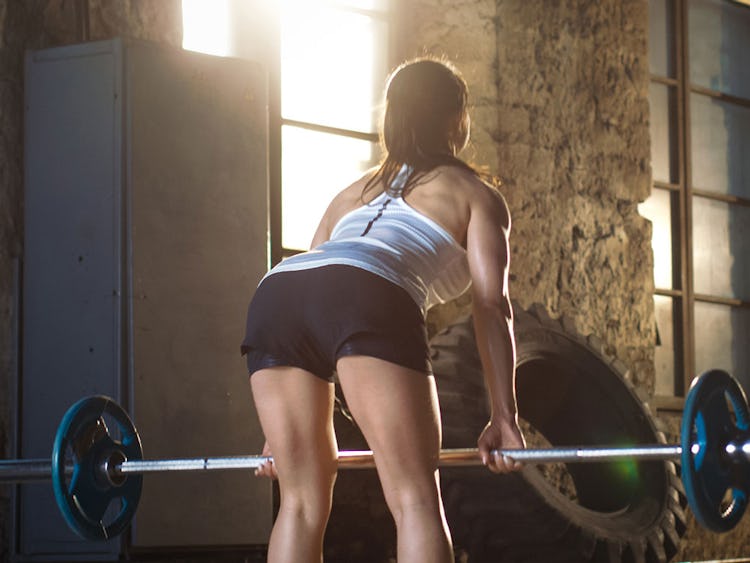
Jumping, sprinting, and all the foundational gym lifts require posterior chain action. Squats, deadlifts, lunges, and their many variations, naturally use the muscles of the core and lower body, but classic upper-body lifts like rows, presses, and chinups call on the backside muscles too. If you’re bench-pressing properly, your glutes should be clenched and your feet driving into the floor. These actions help stabilize the torso.
The posterior chain is mainly responsible for hip extension (pushing your hips to lockout, which uses the glutes and hamstrings), knee flexion (bending your knees, working the hamstrings, primarily), and plantar flexion (raising up onto your toes, performed by the calves). While the pulling and retracting motions provided by the traps, lats, rear delts, and rhomboids are part of the chain, they get worked in most back and pull day workout routines (see examples HERE and HERE), so we won’t spend more time on them here. The lower-body posterior chain muscles are more often ignored, so they’re the focus of this article.
If you’ve been paying attention, you might be wondering about the quads. They’re not part of the posterior chain, but knee extension, initiated by the quadriceps, is obviously important for sports and strength athletes as well; it makes up one-third of the all-important “triple extension” sequence—the simultaneous extension of the hips, knees, and ankles to produce explosiveness. The problem is, lifters commonly overemphasize knee extension in their training. Most gym warriors like to do squats and leg presses (it’s fun to see the legs get a big pump). The posterior chain can also get undertrained simply because the lifter doesn’t see it in the mirror, and so working it is an afterthought. In any case, the result is quads that overpower the glutes and hamstrings, and a posterior chain that’s disproportionately weak. Therefore, most athletes would do well to prioritize the posterior chain and put the quads on the back burner for a while.
“There should be a balance,” says Smith. “Many athletes and lifters become quad-dominant, and begin their squatting patterns by initiating knee flexion first, instead of sitting back into their hips to engage the glutes. When lifters can’t sit back in a squat, the glutes get even weaker, the knees push forward, and that puts even more focus on the quadriceps.” It also shifts more of the load to the lower back, which can lead to injury. “The development of the quads is important for all things, including athletics,” says Smith, “but the hamstrings, glutes, and other posterior chain musculature must also be strengthened to create a balance of forces across the ankles, knees, and hips.”
Imbalanced development due to weak hamstrings, glutes, and other posterior muscles is a recipe for not only diminished strength and athletic performance, but also injury. Lower back and knee pain, just to name a couple common issues, are the debilitating byproducts of neglecting the posterior chain. This is because of the improper squatting Smith described above, as well as a general imbalance that has a domino effect on all movements and exercises.
“A weak posterior chain, especially in relation to the rectus abdominis, quads, and hip flexors, can create an increased potential for injury,” says Brian Strump, DC, a licensed chiropractor, certified strength coach, and owner of Live Active Charlotte in Charlotte, North Carolina. “The risk of low-back pain, hip pain, and knee pain are often greater with increasing imbalances in musculature. The body does best with similar push and pull capability of the muscles and tendons on the joints.”
Further down are five posterior chain-focused exercises to incorporate into your training to improve (or avoid) these issues, and boost your gains and performance.
How To Stretch Your Body Before and After Training
Perform the following exercises from Onnit Durability Coach Natalie Higby (TheDurableAthlete.com) before training the posterior chain. Complete each exercise in sequence. Work for 45 seconds on each move (don’t rush), and then repeat for 3 total rounds.
Sumo Squat
Step 1. Stand with feet outside shoulder width and feet turned out as far as you can. Tuck your tailbone under slightly so that your pelvis is parallel to the floor, and brace your core.
Step 2. Squat down while driving your knees out as much as you can. Keep your shoulders stacked over your hips. Note: don’t hinge at the hips as you would for a back squat movement—keep your body as vertical as possible.
Half Mountain Climber to Full Mountain Climber
Step 1. Get into a child’s pose—sitting back on your heels with both arms stretched in front of you. From there, come up to all fours, and then raise your right knee up to your chest, and plant your foot on the floor outside your right hand (your hands should be directly under your shoulders now).
Step 2. Extend your spine as much as you can, striving to create a long line from your head to your pelvis. Drive your shoulders back and down (think “proud chest”), and keep your right foot flat.
Step 3. From there, extend your left leg, raising your knee off the floor. Your torso may want to round forward, forcing you to lose your spine position. Fight it, and try to maintain extension.
Step 4. Lower your knee to the floor, return to child’s pose, and repeat the entire sequence on the opposite side.
Lying Sphinx
Step 1. Sit upright with your legs extended and rotated out 30–45 degrees.
Step 2. Twist your torso to the left, placing your hands on the floor outside your left hip and driving your shoulders back and down (“proud chest”). Keep your left leg as straight as you can, but allow your right leg to rotate inward as you turn.
Step 3. Bend your hips, trying to bring your torso closer to the floor. Feel the stretch in your left glutes. Come back up, and then twist to the opposite side and repeat.
After training, try this move from Onnit’s Director of Fitness Education, Shane Heins. Hold the position for 30 seconds, and repeat for 1–3 rounds.
Downward Dog
Step 1. Get on all fours, and push through your hands and feet to raise your knees off the floor.
Step 2. From there, push your hips back and high into the air, straightening your legs as much as you can while keeping your head, spine, and hips aligned. Don’t put your heels flat on the floor at the expense of your spine position—focus on length.
Top 5 Posterior Chain Exercises
These moves can be inserted into virtually any lower-body workout. As Smith mentioned, balance is the key—a balance between movements as well as muscles used. There’s no one-size-fits-all description for how to juggle your exercise selection, but a good rule of thumb is to include one of the below movements for every quad-dominant exercise in your program (i.e., back squat, front squat, leg press, leg extension).
If your training has been imbalanced for some time, or you consider your glutes, hamstrings, or lower back to be a major weak point, do twice as many posterior-chain exercises as you do lifts for the quads. For instance, if you want to barbell squat, you might begin the workout with cable pull-throughs and then follow the squat with Romanian deadlifts. (See more on placement of exercises below.) If you follow a body-part split, and find it hard to fit enough posterior chain moves into your leg day, you can add some of them (say, Romanian deadlifts or kettlebell swings) to your back day for some extra pulling—just space it two or more days apart from any leg day you do. Glute/hamstring/lower-back training pairs well with lat and upper back training, as both sets of muscles perform pulling motions and overlap to a degree.
1) Romanian Deadlift
Many will contend that the traditional deadlift is the “king of posterior chain exercises” (as if such a thing existed). It’s a great exercise, and it will absolutely build your posterior chain, but we’re putting the crown on the Romanian deadlift for this list. The conventional deadlift (and, really, the sumo deadlift as well), is very difficult for most people to do with good form. As a result, it’s been the cause of many back injuries. It also takes a lot of drilling to perfect the technique. The Romanian deadlift is more user-friendly, and works nearly all the same muscles (mainly the glutes, hamstrings, and lower back), so we’re giving it the edge here.
The Romanian deadlift (RDL for short) is performed with lighter loads than traditional deadlifts, and doesn’t involve pulling a barbell off the floor. You start at the top, hips locked out, and bend your hips into flexion. That means you’re less likely to round your lower back, regardless of any mobility restrictions you have in your hips. There’s also virtually no strain on the front side of the knee, because the knees remain only slightly flexed throughout the movement.
These features make RDLs a good alternative to traditional deads for those getting up in age, those who have a lot of miles on their joints already, or anyone else that’s concerned about wear and tear on the knees and lower back.
How To Do Romanian Deadlifts
Step 1. Place a barbell on a rack set to hip level. Grasp the bar with your hands at shoulder width, and pull the bar out of the rack. Step back, and set your feet at hip width; hold the bar at arms length against your thighs. Draw your shoulders back and down—think “proud chest,” and keep this upper body tension throughout the lift.
Step 2. Take a deep breath into your belly and brace your core. Begin bending your hips back. Keep your head, spine, and pelvis aligned as you slide the bar down the front of your body—keep it in contact with your legs. Allow your knees to bend slightly as you hip hinge. Continue until you feel a stretch in your hamstrings. On the way back up to standing, squeeze your glutes.
For most people, the bar will end up somewhere between the knees and lower shins in the bottom position.
Exercise Variations
The RDL can also be done with one leg at a time using a barbell, one or more dumbbells, or a barbell in a landmine unit (all of which are discussed in our guide to the single-leg RDL HERE). Single-leg RDLs are a must-do for ensuring balance between the right and left legs; with the standard double-leg version, a stronger side can potentially compensate for the weaker side and further magnify strength imbalances. One good strategy is to alternate between double- and single-leg RDL variations every other time you do RDLs.
Sets/Reps/Load
Perform 3–4 sets of 6–10 reps on heavy days, and anywhere from 12–20 reps on light days.
2) Cable Pull-Through
Like RDLs, cable pull-throughs are a great way to zero-in on the glutes and hamstrings. But that’s not to say they’re just the same exercise with different equipment. Running the cable between your legs and behind your body creates a unique line of pull. On any deadlift variation, the resistance is pulling straight down; but with a pull-through, it’s going backward.
“Pull-throughs are great for teaching the hip hinge,” says Smith—your ability to bend your hips while keeping your head, spine, and pelvis in line—“because the line of pull of the cable drives the athlete’s hips back. The exercise also teaches a powerful lockout of hip extension at the top of the rep, which is important for jumping, deadlifts, and squats.” Another benefit to pull-throughs is that they’re easy on the lower back. You’re not loading it directly as you do in a back squat, deadlift, RDL, or good morning, so you’re not likely to aggravate it. You can just concentrate on extending the hips.
Because it’s something of an isolation move done with a cable instead of free weights, the pull-through may seem like a natural finishing move for a leg workout, but Smith actually prefers to program it early, before the big lifts. “Pull-throughs create a neural drive to the glutes, and work well as a primer before a loaded lower-body strength workout with exercises like squats and deadlifts,” he says. In other words, if you start your workout with pull-throughs you may feel your glutes and hams working harder on your other exercises, as well as feel that you have better control over them.
How To Do Cable Pull-Throughs
Step 1. Stand in front of a cable column, facing away from it, with a rope handle attached to the pulley. If possible, set the pulley height to where it’s right below your crotch, which will make for the most direct line of pull. Otherwise, use the low setting.
Step 2. Straddle the cable and grasp the ends of the rope in front of your thighs so that the cable runs between your legs and behind you. Step forward to raise the weight off the stack, far enough so that it won’t touch down at the bottom of the rep. Space your feet shoulder-width part.
Step 3. Push your hips back to slowly your lower torso, keeping your back flat throughout, and your knees slightly bent. Lower until you feel a stretch in the hamstrings.
Step 4. Extend your hips, focusing on contracting your glutes and hamstrings, to return to the standing position.
Exercise Variations
Pull-throughs can also be done with a resistance band. When using a band, anchor it to a sturdy object, and step far enough away from the anchor point to create a good amount of tension. As with the cable version, there should still be tension on the band at the bottom of each rep.
Sets/Reps/Load
Perform 2–3 sets of 12–15 reps using a moderate weight. As mentioned above, you can slot pull-throughs early in a lower-body workout, before compound moves like squats or deadlifts, but they also work well done for high reps to finish out a session.
3) Medicine-Ball Throw for Height
This exercise works similar to a jump squat, but don’t let the squat fool you into thinking this is just a dynamic quad move. As Smith puts it, what you have here is a “full-body expression of explosive power, utilizing the major joints of the body and the entire posterior chain working together as a single unit.”
This version of the med-ball throw first teaches you to decelerate. You drop into the squat quickly to generate power, but you put the brakes on fast so you don’t sink too low. Then it builds your ability to change direction on a dime, as you have to come back up out of the squat fast and jump up while launching the ball overhead. The ankles, knees, and hips do this, just as they work in any other triple extension movement.
In other words, with one powerful, lightly loaded move, you’re training your ability to absorb, redirect, and explode, all the way up the backside of your body, from calves to upper traps.
How To Do the Medicine-Ball Throw for Height
Step 1. Pick up a 10- to 20-pound medicine ball and go to an open area (no people or equipment close by), either outdoors, or a room with high ceilings. Stand with feet shoulder-width apart, and hold the bottom portion of the ball at arms’ length in front of you.
Step 2. Keeping your head, spine, and pelvis in a straight line, quickly bend your hips back, and squat about halfway down.
Step 3. Rebound out of the bottom of the squat explosively, extending your hips and knees to propel you upward. As you do, throw the ball straight up in the air as high as possible. The movement should be so powerful that your feet leave the floor by a few inches at the top.
Step 4. Land with soft knees, and keep an eye on the ball to make sure it doesn’t hit you on the way down. Let it fall to the floor (don’t try to catch it), and then pick it up and perform the next rep. Don’t rush between reps—settle yourself and get back into proper position.
Exercise Variations
Medicine-ball throws can be done several different ways. The ball can be thrown out in front of you for distance, or even back behind you. You can also change the exercise by holding the ball in front of your upper chest and performing an overhead pressing movement as you come up from the squat, again releasing at the top and letting the ball fall back to the floor.
Sets/Reps/Load
Perform 2–3 sets of 5–8 reps using a 10-20-pound ball. The purpose of med-ball throws in this context is to develop explosive power; it’s not about building muscle directly or even conditioning. Keep the volume low, the weight light, and recover fully between sets with 2–3-minute rest periods. Do this move early in a lower-body strength session, before loaded squats, deadlifts, and/or lunges.
4) Kettlebell Swing
Kettlebell swings have become a poster child for posterior chain development in the last couple decades, thanks in part to the popularity of CrossFit and kettlebell training. When performed correctly, swings check off several important boxes.
“Not only does the kettlebell swing work your hamstrings and glutes, it also requires explosiveness and coordination from the trunk, core muscles, and shoulders,” says Jucha. “You’ll work the posterior chain, but you’ll also practice the essential hinge movement pattern for explosive power.”
The kettlebell swing is a unique exercise in that it’s effective for developing explosiveness, but it’s also commonly done for high reps to improve conditioning (as in CrossFit WODs). If doing the latter, proper form is paramount for keeping the lower back safe.
How To Do Kettlebell Swings
Step 1: Place a kettlebell on the floor and stand about two feet behind it with feet shoulder-width apart. Draw your shoulder blades together and downward (think: “proud chest”). Draw your ribs down, and tuck your tailbone slightly to make your pelvis level with the floor. Brace your abs.
Step 2: Bend your hips backward to lower your torso and grasp the handle of the kettlebell with both hands, overhand. Keeping a long line from your head to your pelvis, and your shoulder blades pressing downward toward your back pockets, shift your weight to your heels. Bend your knees slightly and lift the kettlebell off the floor and hike it back between your legs.
Step 3: When your wrists make contact with your inner thighs, forcefully contract your hamstrings and glutes and thrust your hips forward, coming into a standing position. The momentum you generate will swing the kettlebell forward and up to about eye level. Allow the kettlebell to swing back between your legs, folding at the hips and bending your knees slightly as the kettlebell swings down and back to begin the next rep.
Do not lift the kettlebell with your upper body, as if performing a front raise shoulder exercise. The swing is an explosive movement and the glutes and hamstrings must perform almost all of the work.
Exercise Variations
Kettlebell swings can be performed holding the weight in only one hand, and they can also be done holding one kettlebell in each hand (but that’s advanced). Swings can be done with a dumbbell in place of a kettlebell (holding it in one or both hands), but a kettlebell generally offers a better grip and is more practical.
Sets/Reps/Load
Kettlebell swings are most often programmed with relatively high rep counts—anywhere from 15 up to 50+ reps per set. That said, if you’re new to the exercise, start at the low end to build good technique without fatigue setting in.
Beginners to the swing (or lifting in general) should do 2–3 sets of 10–15 reps using a light kettlebell (10–15kg, or 22–33 pounds). More experienced lifters can work up to 3–5 sets of 25–50 reps using a heavier kettlebell (up to 24kg/53 pounds, or more for very advanced individuals).
5) Hip Thrust
When you want to target one particular group of muscles, isolation exercises are best. Three of the aforementioned posterior-chain moves—RDLs, pull-throughs, and kettlebell swings—focus on the hip hinge, with the upper body moving freely in space. To better isolate the glutes, the shoulders and upper back can be locked into place with a flat bench while the feet are anchored to the floor.
The hip thrust is an exercise utilized as much by physique athletes wanting to develop their glutes as it is powerlifters looking for a relatively safe way to load up the posterior muscles with heavy weight. As with the pull-through, there’s little stress on the lower back with hip thrusts.
We’d be remiss not to reference Bret Contreras here, aka “The Glute Guy,” and arguably the leading torchbearer of the hip thrust exercise. (He even invented a special piece of equipment, The Hip Thruster, specifically for this movement.) Research performed by Contreras and others has shown greater muscular activation by the hip extensor muscles (glutes, hamstrings) during the barbell hip thrust compared to other major exercises like the front squat and traditional deadlift.
“The hip thrust is incredibly functional,” Contreras states on his website BretContreras.com. “Not only does it safeguard people from injury to the knees, hips, and low back, it also transfers quite favorably to performance. Lifters and athletes who employ the hip thrust notice improved gait function at all speeds, increased hip power, stronger squats and deadlifts, increased throwing/striking power, and more. They build glute hypertrophy [muscle growth] incredibly well, and this added glute mass does wonders for improving functional fitness.”
How To Do Hip Thrusts
Step 1. Load a barbell on the floor. Lie with your upper back resting on a bench and your legs flat on the floor in front of you. Your torso should make a roughly 45-degree angle with the floor. Roll the bar into the crease of your hips (you may want a pad or towel to cushion it), and hold it firmly on each side. Place your feet flat on the floor, hip-width apart, and turn your toes out slightly.
Step 2. Tuck your tailbone so that your lower back is flat. Take a deep breath into your belly, and brace your abs. Drive through your heels to extend your hips, finishing when your torso and hips are parallel to the floor, and your shins are vertical. Hold the position for a moment.
Exercise Variations
Hip thrusts can (and should) also be done one leg at a time. When doing so, the technique and equipment is the same, only the non-working leg is lifted off the floor in front of you. You will, of course, have to use much less weight.
Single-leg hip thrusts are ideal for promoting balanced development between the right and left sides. Alternate between double-leg and single-leg versions every time you do hip thrusts.
Sets/Reps/Load
Perform 2–4 sets of 12–15 reps. Make sure you use a weight that allows you to reach full hip extension on every rep.
)

