I thought I was all set to kick some major ass. I began training in February for the toughest fitness challenge of my life and in the meantime, I not only got myself back to the conditioning level of when I was in High School, I also dropped 45lbs in the process.The event was the Warrior Challenge, and it required me to carry a 40lb sandbag for a 1/2 mile run at the end of July. “No problem,” I thought to myself. I had worked up to a 55lb sandbag for a full mile, so I thought that I was beyond prepared… boy was I wrong!
Somehow notification was never given, or I completely missed it, but the sandbag ended up being 100lbs (talk about a rude awakening)! Either way, my suffering is still your gain, because today I am going to show you how you can condition yourself to get used to the demands of carrying 50 lbs-plus of gear while going into the fray of a wildfire, even if you haven’t done conditioning work in years (like I hadn’t).
To go from never wearing gear and carrying tools ever in your life to throwing all of it on and expecting not to fatigue when danger is at its highest would be crazy. The system I’m showing you today will allow you to work up to the weight of your gear and beyond so that you can get ready for these physical demands and also get that psychological edge as well.
This system involves loading chains around your body in order to gradually increase the amount of weight that you can carry while performing conditioning work. There are several great things about chains that make them perfect for preparing for the physical demands of your job.
1. Chains Come in Many Sizes.
You can find them very thick or very thin, they are made of different materials that make the links either heavier or lighter, and they can be cut to various lengths, which also modifies their sheer weight.
2. Chains are Flexible.
Because chains can be twisted, you can literally turn them into a suit of armor that you can use to make you training much more functional and beneficial for the type of work you need to prepare for.
3. Chains Go On & Off Quickly.
Setting up your chains for training takes less than a minute. When you are done, spent, and ready to collapse, they are easy to remove, either by yourself or by a training partner. If by chance they seem a bit too heavy, you can rip off single portions of chain to get some relief, and then pick them up later when you are done training.
4. Chains Offer Progressive Resistance.
You can start out light when you first start using this system, and then by adding additional chains, you can gradually make your loading more and more challenging each time you train.
These are just a few of the great things about chains. I am sure there are more, but you get the point. Now, let’s look at the various ways you can use chains for your much needed firefighting conditioning.
Beginning Strongman Endurance with Heavy Chains
The main way I used chains was with my running. I had to prepare to carry a 40lbs and bag (so I thought) for a mile, yet when I began training the run, I didn’t even add any chains and I could only go for 3 minutes before I had to stop and rest (pathetic)!
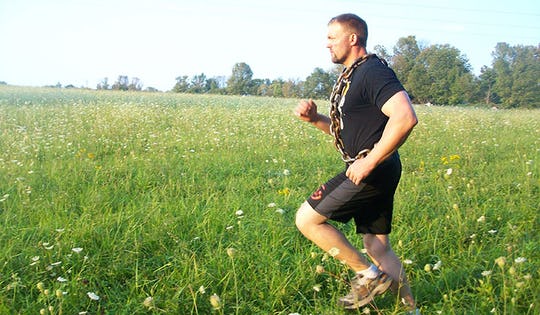
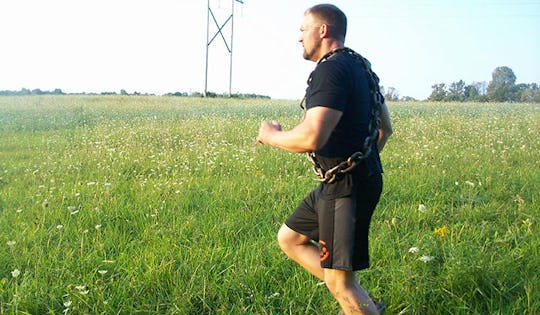
I started out with a couple of very light chains looped around each side of my neck. Even though I knew I would have to carry a sandbag and I would be unilaterally loaded, I knew I had to start out balanced first.With the chains crossed, I could run with an additional 20lbs, but the weight was balanced, just like wearing a weight jacket, so my back and core could handle it fairly well.
As I progressed, I would add chain weight and on one occasion I worked up to 96lbs in chains. This was TOUGH. Once I finished that session, I knew my cardio had improved greatly and I knew I was ready for some unilateral loading.
For the unilateral loading, I filled up contractor bags with sandbox sand and then inserted them in to a feedbag. This is a great combination because the contractor bags are very thick and can take a beating.The feedbags are pretty tough too, plus they give you a little something to grip onto so when you are running it is a bit easier to keep the bag in place.
Along the way, I also trained with a ruck sack. Chains do not work well for loading a ruck,because all of the weight ends up at the very bottom of the ruck sack and as you run, beat- ing your lower back to hell. But, the way the ruck sits on your body is very similar to the way your gear will sit on your body, so there might be some value to experimenting with something smaller, like a school backpack loaded with sand, or one of the cool weight loadable ruck devices that are becoming available these days.
As you can see, as we add chain weight, we are also working to increase the time we run and decrease the time we stop to rest. This is very close to how I progressed. If you are in better shape than I was, then you may be able to lengthen your runs and decrease your rest already. After the fourth week though, regardless of your conditioning, it is time to start eliminating rest periods altogether as much as possible.
Important: I did my runs in a field. I knew I would be running on a beach for the Warrior Challenge, so I did not want the traction benefit of a road or track. Also, I wanted to look after my knees and back. I was 280+ lbs when I started out. That bodyweight plus chains added, I was afraid that I might wear out my knees and back due to the shock force of running on a hard road. Luckily, since I ran in the grassy field and started out light and gradually increased chain weight, I felt NOTHING in either my back or knees the entire time I did this.
Strongman Endurance Progression with Heavy Chains
Take note, since I was training for a mile run, I ran at a fairly constant speed throughout the run. While you may see times where you will need to cover a great distance in your skirmishes, you will also most likely have to do some sprinting as well, or at least some periods of rushing. With this in mind, you may also want to work in some faster-paced conditioning with the chains by either adding an extra day into the 4-week layout or by replacing one of those days with sprint/ rushing work.
Naturally, there’s no rule saying you need to use chains for this conditioning method. If you don’t have piles of chain laying around, then the sandbag, ruck sack, backpack, or even a regular weight vest will work just fine. But I can tell you that when you train with chains wrapped around your body, it feels awesome. The weight can feel smothering, but it also gets you pumped up at the same time, just like Squats with big weight on your back, or pushing yourself further with ultra-high-rep Kettlebell Snatches. It is HARD, but that is what makes it GREAT.
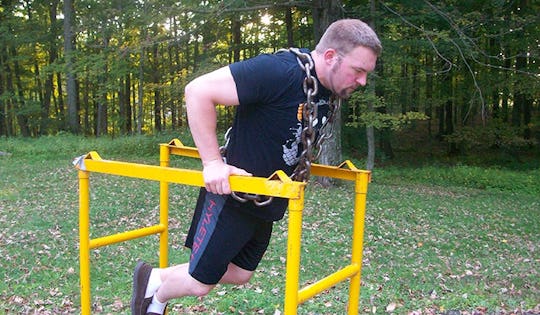
Finally, chain work does not have to be limited to running. You can also wear the chains while you do other forms of training. They are great for adding weight to bodyweight exercises such as Pull Ups and Dips. They can also be worn throughout a workout session in order to increase the overall demand on your full body and postural muscles. Also, when you wear chains, packs, or vests and keep them on between sets, it challenges your recovery ability. Remember, even if you step back from the flames to catch your breath, you will still have the weight of all that equipment on your body.
Doing full gym workouts while wearing some chains could be the last “link in the chain” to getting you as prepared as possible before your first wildfire fighting experience. It has been my pleasure to pass on my experience with chain training to you. You have an important job that I respect greatly, and each life you save touches countless others. If I help only one person to get just a little better prepared, then I am happy. If you have any questions about this training, feel free to contact me at DieselCrew.com. Thank you for what you do.
Strongman Endurance with Heavy Chains Workout
Here is an example progression over the course of a month to get you going with your loaded conditioning. This is interval work, where you move back and forth between running and either resting or walking. I encourage you to walk during the rest period unless you absolutely must stop and rest with your hands on your knees for instance. Sitting down or laying down is out of the question though. It is harder on your heart and doesn’t do much to get you ready for the rigors of your job. At least when you walk you are moving, so lean towards that if at all possible.
| Month | Day 1 | Day 2 |
| Week 1 |
Run 2 minutes, rest/walk for 1 minute, for a total of 15 minutes. (15-20lbs of chain) |
Run 3 minutes, rest/walk for 1 minute for a total of 15 minutes. (15-20lbs of chain) |
| Week 2 |
Run 3 minutes, rest/walk 1 minute for a total of 20 minutes. |
Run 3.5 minutes, rest/ walk 1 minute for a total of 20 minutes. (20-25lbs of chain) |
| Week 3 |
Run 3.5 minutes, rest/walk 1 minute for 20 minutes. (30-40lbs of chain) |
Run 3.5 minutes, rest/ walk 30 seconds for 20 minutes. (30-40lbs of chain) |
| Week 4 |
Run 4 minutes, rest/walk 1 minute for 20 minutes. (40lbs+ of chain) |
Run 4 minutes, rest/ walk 30 seconds for 20 minutes. |


)


