If you’re planning on taking a summer vacation road trip this year—gas prices and inflation be damned—then good for you! You may have to stretch your dollar, but you don’t have to stretch your waistband, as road travel allows you full control of what you eat from Point A to Point B, as well as the opportunity to get some exercise along the way (for example: rest stop stretching sessions, outdoor park workouts, etc.). You may be on holiday, but you don’t want to come home looking and feeling worse than when you left in the first place, so it pays to take some some healthy habits with you for the ride.
I’m going to share some of my favorite strategies for healthy vacationing, from foods and recipes that travel well (and still taste great) to workout tips that can keep you in shape. It’s the same advice I give my clients—who range from moms and dads to pro athletes and busy businesspeople—whenever they go away. You may even come back from your trip leaner than when you started.
How Do You Eat Healthy on a Long Road Trip?
If you’re currently following a diet, sticking to it while traveling can be extremely challenging. You’ve probably already given yourself permission to go off-plan because you’re on vacation, but, if you want to avoid weight gain, you shouldn’t give yourself license to eat anything and as much of it as you like. A better strategy is to focus on what I call controlling the “controllables.” That is, make the best nutrition decisions you can under whatever circumstances you find yourself in (give or take a few).
For example, you may be out to eat at a restaurant that specializes in decadent desserts. Of course you should indulge in the chocolate soufflé at the end of the meal, but maybe you want to pass on the dinner rolls and booze. They may not have the nitrite-free salami you usually buy for keto snacks at the next gas station on the highway, but that doesn’t mean you cave in and eat the microwave pizza they offer instead. My point is that you can’t always control the food around you, but you can control what and how much you eat.
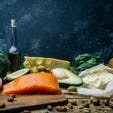
You can avoid being at the mercy of roadside food service by planning ahead and packing foods that will last in the car. Great non-refrigerated options include:
- Nuts
- Seeds
- Beef or turkey jerky
- dehydrated fruit
- dehydrated veggies
- tuna or salmon packets (many of these come pre-seasoned and are tasty right out of the bag)

All of the above are portable and durable, and can fit for most diets. They won’t take up much room in a travel bag, and they don’t mind being squished (should your luggage, or, perhaps, a small child in the backseat, happen to fall on them). They’re also pretty inexpensive; so it’s hard to justify a trip through a fast-food window for the sake of price and convenience. Furthermore, these snacks pack some serious nutrition. The jerky, tuna, and salmon are all protein-rich, which helps keep you full. You might easily eat a whole bag of pretzels or chips without giving it much thought (especially if you’re distracted by the road), but it’s hard to overeat high-protein foods, so you won’t take in huge numbers of calories that you can’t burn off. Protein foods also require more energy to digest than carb- or fat-rich foods, so your body burns more calories just by eating them.
Tuna and salmon have the added bonus of being good sources of omega-3s, essential fats that you have to get from your diet because your body doesn’t make them. Omega-3s offer a huge range of benefits, including supporting brain, heart, and joint health.
Nuts and seeds are high in fat and fiber, which, like protein, can be satiating, making them a better snack alternative than processed foods that are largely devoid of both.
Meanwhile, fruits and veggies—even dehydrated—are all loaded with vitamins, minerals, and antioxidants that help keep your immune system going strong. They’re also high in fiber. Of course, whole fruits and vegetables are fine too, and harder to overeat than the dehydrated variety, but they’re a bit more difficult to travel with (an overripe banana that gets crushed under a seat will make an awful mess and smell up the car in no time). Just think ahead and pre-wash them before you pack, so you can take them out of your bag and start noshing right away.
If you’re going long distances between rest stops and food options, you’ll also need to invest in a good cooler to pack some quality meals that last.
My crew had its share of road trips this summer, and we had two coolers that kept our cold foods cold for days on end—literally. For longer trips, we always take our OtterBox Venture 65 ($350), which, when packed properly, can keep ice for up to 16 days. It holds 65 quarts—that’s 36 12-oz cans, to put it in beer terms (because, well, you’re on vacation after all). It’s 40 inches long, and nearly 19 inches wide as well as high. The Venture 65 features an accessory mounting system so you can attach add-ons like a bottle opener and dry storage tray. Plus, as the video on their website proclaims, the cooler is “certified bear resistant… Can you say the same about your tent?”
And for those shorter trips, our OtterBox Trooper LT 30 ($300) is perfect. At 21 inches long, 17 wide, and 11 deep, this cooler has a soft outer shell and opens easily for quick access. Its main selling point is that it doubles as a backpack, so you can take it out of the car and onto the trails with you. It holds 30 quarts and is leak-proof.
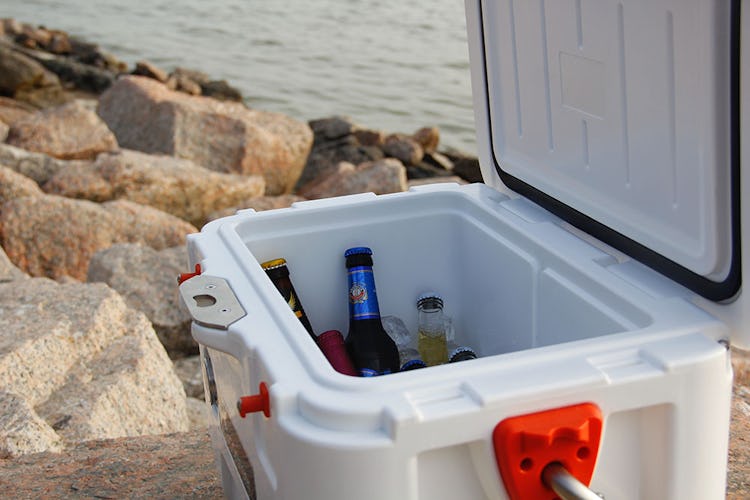
Good food choices that need refrigeration include the following:
- Hard-boiled eggs
- Greek or Icelandic yogurt
- Individual kefir milks
- Organic cheese cubes, sticks, or slices
- Organic nitrite-free deli meats
- Hummus
Eggs have always been a potent and low-cost protein source, and when they’re hard-boiled, you can’t beat the convenience. (Get the organic, omega-3 rich, pasture-raised kind if you can.) Greek and Icelandic yogurt are high in protein but, unlike most other yogurts (such as those with fruit on the bottom), have less sugar per serving. If plain yogurt is too bland for you, add your own fruit or non-nutritive sweetener. (Again, organic dairy is preferable.) As with eggs, yogurt is also pretty easy to eat in a car or RV and doesn’t require much cleanup.
“What the heck is kefir,” you say? It’s essentially a drinkable yogurt that’s rich in probiotics—bacteria that support a healthy gut.
Of course, sandwiches are a traditional road-trip eating staple, and there’s no reason they can’t be healthy if you make a couple smart substitutions. Multigrain bread is a better choice than white, and for the greatest assurance of good nutrition and food safety, use certified organic meats and cheeses. Spread on some grainy mustard, or use hummus for even more fiber, add a tomato slice, and voila—you’ve got yourself a pretty satisfying (and lean) sandwich.
If you don’t have much time to pack before you hit the road and have to stock up at a gas station, you’re not without options. And, no, I’m not talking about the cheese-filled rolling hot dogs that have been rotating under glass since Hulk Hogan was the world heavyweight champ, or anything that leaves your fingers a strange, neon orange glow.
Most gas stations these days have peeled hard-boiled eggs, snack packs with cheese, nuts and dried fruit, deli meat sandwiches, and subs. For the latter, get two sandwiches/subs if you can, double the meat, and halve the bread, so you have one big sandwich that’s protein-packed. Fresh fruit, beef jerky, nuts, seeds, dark chocolate (85% or higher cocoa), protein bars, organic individual milks, fruit pouches, and nut butter packs are almost certainly going to be available as well, so don’t think you have to starve yourself till you reach your destination.
Maintaining a Healthy Diet While Camping Or Hiking
Camping out doesn’t mean you have to leave the discipline of your kitchen entirely behind. When you’re planning to eat out under the stars, think of foods that don’t need refrigeration, even if you do have a cooler. Cans and pouches of wild-caught tuna, salmon, or sardines can be incredibly valuable whether you are out in the backcountry, or just want to keep food options simple while car camping. Grass-fed beef jerky, along with alternatives such as turkey, chicken, and even salmon jerky are all amazing options that are portable, convenient, tasty, and a great source of protein and micronutrients like sodium (which can help replenish what you sweat out on a long hike).
One of my favorite campsite-friendly foods is aged, hard cheese, and not just because I grew up in an Italian family in Jersey. Parmigiano-Reggiano packs 11 grams of protein per one ounce (about the size of a pair of dice), and doesn’t need to be refrigerated! Ounce for ounce, that’s more protein than chicken, beef or fish (those each offer about seven grams per ounce). Parmigiano-Reggiano can be cubed up to make a delicious savory trail mix. (While I argued that gas station fare can be OK earlier, I’d skip their trail mixes. They’re usually more M&M’s and added sugar than nuts and dried fruit.)
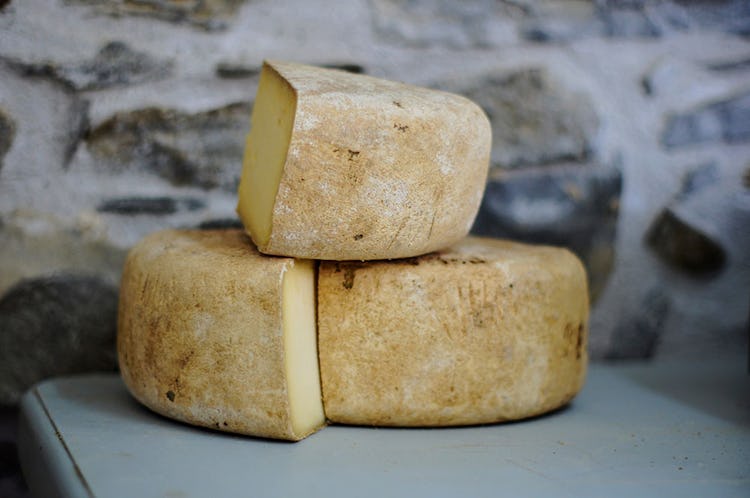
What exactly is a “savory trail mix?” I like at least a 2:1 ratio of nuts to dried fruit, a little jerky, and cubes of dry aged cheese. The dried fruit offers some carbs and potassium to fuel your hikes, and the rest of the mix really serves to curb hunger. Added sugar can cause energy crashes later and hinders endurance activities, so a quality fat and protein combination is a better choice to help keep you going on long walks in the woods.
Here’s the exact recipe I make for my family.
Savory Trail Mix
- 4 handfuls salted pecans, almonds, pistachios, or walnuts (we add salt to replace the sodium that’s lost in sweat)
- 3 oz (that’s the size of 3 pairs of dice) cubed Parmigiano-Reggiano cheese
- 2 handfuls dehydrated fruit (raisins, figs, dates, apricots, blueberries, etc.)
Athletes and active people tend to obsess over protein and agonize over carbs, but it’s important to remember that whole fruit is good, both for the fluids it provides, which you’ll certainly need when being active outdoors, and for its vitamins and minerals. There are plenty of fruits and vegetables that can withstand a little beating in your cooler, backpack, or even some jostling around in the back of your car. Here’s a reminder of what they are:
- Apples
- Avocados
- Berries (just be sure to pack them in a non-squishable container, or the dry storage top that comes with the OtterBox Venture cooler I suggested earlier)
- Carrots
- Oranges
- Mini peppers (great for snacking!)
Now let’s talk about grilling. Most campsites will have a grill that makes cooking a breeze (or twigs, rocks, and fire starters can make for a safe cooking environment, too). If you want to take it to the next level, consider the Looft Lighter X, a battery-operated fire starter that will light your fire in 60 seconds, guaranteed (thanks to forced air that heats up to 1200 degrees).
Leaner cuts of meat or fish will offer lots of protein with fewer calories, and all can be cooked effectively over a flame. Vegetables and potatoes make good sides.
Here are a few of my go-to camping eats.

Breakfast
Breakfast Skillet Hash
Refrigerated egg products like Egg Beaters® cut down on mess, cook quickly, and can add protein and versatility to many meals. Here’s an awesome recipe for breakfast hash.
Servings: 4
INGREDIENTS
- 2 tbsp. olive oil
- 1 large sweet potato, peeled and diced (the smaller the dice, the faster it will cook)
- ½ cup chopped onion
- ½ tsp. dried Italian seasoning, crushed
- ¼ tsp. garlic powder
- ¼ tsp. black pepper
- ⅛ tsp. salt
- 2 cups fresh baby spinach
- ½ cup refrigerated, cooked, crumbled turkey sausage
- 1 ½ cups refrigerated egg product (like Egg Beaters®)
- ½ cup shredded mozzarella
NOTE: Mix all the ingredients from the sweet potato to the spinach together ahead of time in a resealable plastic container.
DIRECTIONS
Step 1. Light firewood or charcoal and let the campfire burn down to medium-hot embers, or coals. Top with a grill rack.
Step 2. Heat a 10-inch cast iron skillet over the campfire for 5 minutes, or until very hot. Add the oil to the skillet, and the mixed ingredients noted above, stirring occasionally.
Step 3. Add the sausage. Cook 5 minutes more, or until the vegetables are tender, stirring frequently.
Step 4. Add the egg product. Cook, without stirring, until the mixture begins to set on bottom and around the edges. Using a spatula or large spoon, lift and fold the partially cooked egg mixture so the uncooked portion flows underneath. Continue cooking 2 to 3 minutes, or until the egg mixture is cooked through but is still glossy and moist. Sprinkle with the cheese.
Lunch and Snacks
Camping Charcuterie
Here’s how to bring an assortment of no-fuss foods together for a balanced meal.
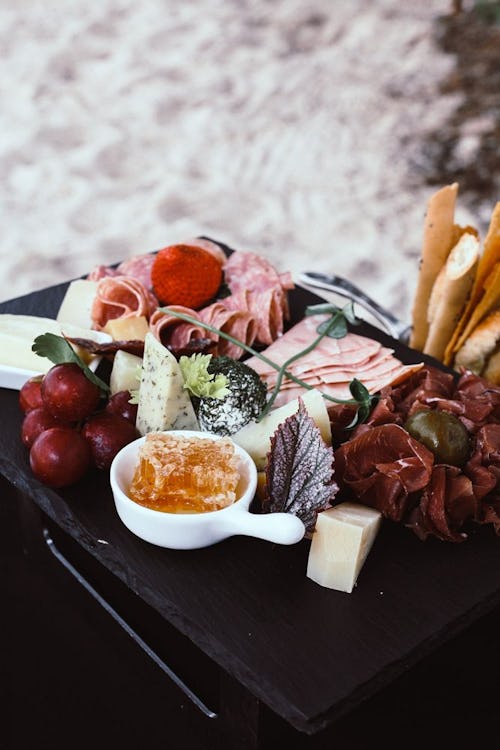
Step 1. Pick a cured meat and a cheese
Step 2. Add sliced veggies and fruits
Step 3. Lay out a nut- or seed-based cracker
Step 4. Fill in with olives, pickles, or dips
All-natural deli meats need to be kept cold, but they also pack easily. Rolling up a slice around matchstick veggies, leafy greens, and cheese if you choose makes a quick lunch. Dip in hummus or mustard for a little added flavor. Nut- and seed-based crackers are more fibrous and filling than wheat-based ones, so you should eat fewer of them.
Apple Salami Bites
INGREDIENTS
- 1 apple
- 6 slices salami
- 1/2 avocado, sliced
- Organic cheddar cheese (optional)
DIRECTIONS
Step 1. Core apple and slice horizontally. Top each slice with a piece of salami. Finish off with sliced avocado. If using cheese, place between the salami and avocado.
Snack Time Skewers
One way to organize a lot of low-fuss, grab-and-go foods is to lay them out ahead of time and run a sword through them, so to speak. Skewering lunch meats, cheeses, fruits, and veggies combines them for a meal you can take on the go, and controls your portions automatically.
INGREDIENTS
Options:
- Thick cut all-natural salami
- Nitrate/nitrite-free deli meat
- Fresh mozzarella or cubed cheddar
- Bell peppers, chopped
- Cherry or grape tomatoes
- Apple, chopped
- Olives
- Cucumber, thick sliced
- Fresh berries
DIRECTIONS
After selecting and cutting your preferred ingredients, carefully add them to snack-sized skewers. As many ingredients as you can comfortably fit on the skewer is one serving. Eat right away, or store in baggies or containers to eat on the trail, or while driving.
Dinner
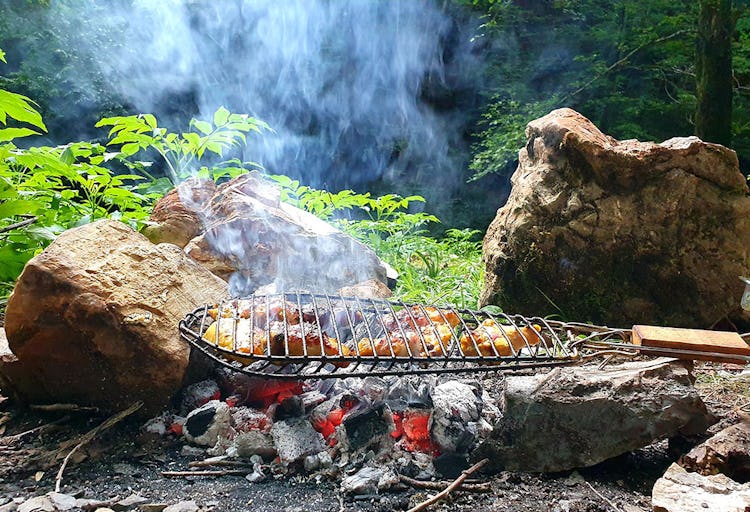
Grilled Salmon with Sweet Peppers
Servings: 4
INGREDIENTS
- 1 ¼ pounds skin-on salmon fillet, cut into 4 portions
- 1 tbsp. extra-virgin olive oil
- ½ tsp. kosher salt, divided into two ¼ teaspoons
- 1 pound sweet mini bell peppers
- 2 medium red onions, quartered
DIRECTIONS
Step 1. Preheat a gas grill to high, build a fire in a charcoal grill, or build a campfire and let it burn down to high heat (about 500 degrees F).
Step 2. Brush or drizzle salmon with the oil and sprinkle with 1/4 teaspoon salt. Sprinkle peppers and onions with the remaining 1/4 teaspoon salt.
Step 3. Oil the grill rack. Place the salmon, skin-side up, on the grill, along with the peppers and onions. Grill the salmon until browned, 3 to 4 minutes.
Step 4. Using a metal spatula, gently nudge one of the salmon pieces: it should release from the grill without much force, but if it feels stuck, continue cooking for another minute. When the salmon releases easily, flip and continue cooking until browned and the flesh is opaque, about 3 minutes more. Cook the peppers and onions, turning frequently, until tender and well browned—8 to 10 minutes total.
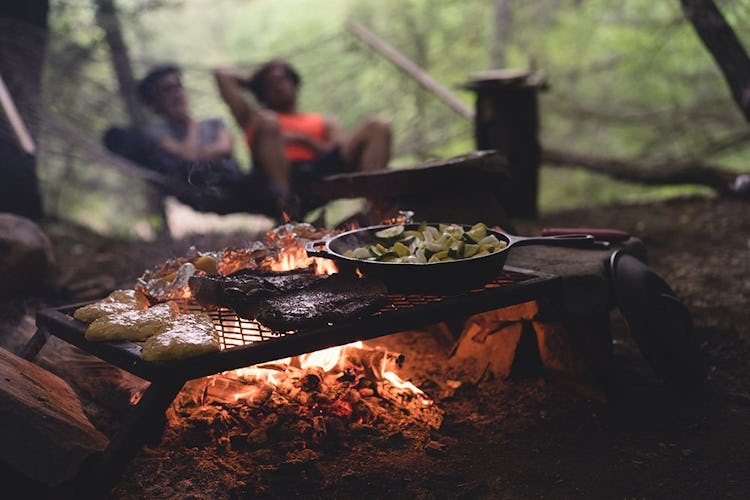
Pan-Roasted Campfire Veggies
Servings: 4
INGREDIENTS
- 1 tbsp. water
- 1 tbsp. reduced-sodium soy sauce
- 2 tsp. cider vinegar
- 1 tsp. Sriracha sauce, or more if desired
- 2 tsp. canola oil
- 1 (8 oz) package whole fresh button mushrooms
- 8 miniature sweet peppers
- ½ cup grape tomatoes
DIRECTIONS
Step 1. Light firewood or charcoal and let the campfire burn down to medium-hot embers or coals. Top with a grill rack. Heat a 10-inch cast iron skillet over the campfire for 5 minutes, or until very hot.
Step 2. While the skillet heats, add the water, soy sauce, vinegar, and sriracha sauce to a small bowl and stir together.
Step 3. Add the oil to the skillet. Add the mushrooms and sweet peppers, and cook 8 to 10 minutes, or until the vegetables begin to char, stirring once or twice.
Step 4. Add the sauce, and cook until slightly reduced. Add the tomatoes, and cook 1 minute more, stirring to coat the vegetables with sauce. Serve immediately, or at room temperature.
Dessert
Here’s a little twist on a classic treat that includes bananas for some added potassium—always a good way to replenish after a long day of hiking.
Banana S’Mohrs (see what I did there?)
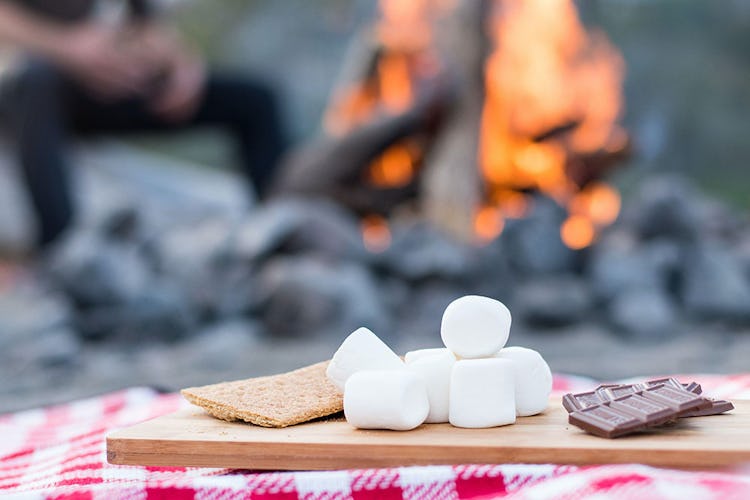
INGREDIENTS
- 1 medium ripe banana
- 2 tbsp. mini marshmallows
- 1 tbsp. dark chocolate chips
- Graham crackers (optional)
DIRECTIONS
Step 1. Cut through the peel on the inside curve of the banana with a paring knife. Peel the banana open from the cut, but leave the banana in the peel.
Step 2. Being careful not to cut through the bottom peel, cut the banana in half lengthwise; then cut crosswise in 1/4-inch intervals. Gently mash the marshmallows into the sliced spaces in the banana, and then top with chocolate chips.
Step 3. Tear off a 12-inch square of heavy-duty aluminum foil. Place the prepared banana in the middle of the foil, and crimp the foil closed.
Step 4. Prepare a campfire and let it burn down to the coals. Cook the packet 4 to 6 inches above the coals until the s’more is warm and melty—7 to 10 minutes. Use graham crackers for scooping, or, to go gluten-free and cut carbs, eat it with a spoon.
If you want to make the s’mores ahead of time, assemble the packets and store in a refrigerator or cold cooler for up to 1 day.
Keto Snacks for the Road or Off the Beaten Trail
Much of what I’ve listed above can fit a keto diet or low-carb lifestyle. If that’s how you like to eat, here are a few more options that you can use to fuel your next adventure.
- Celery sticks filled with nut butter or cream cheese
- Avocado on parmesan cheese crisps
- DIY keto snack box. (Get a portioned container and put a hard-boiled egg, deli meat, chopped cucumbers and zucchini, and cheese in the different compartments.)
- Red peppers wrapped in turkey
- Keto-friendly protein bars
Hydration
Long days on the trails mean you have to be conscious of hydration, especially if you’re drinking alcohol. Have an insulated, refillable bottle topped off with water with you at all times. If you plan to be out hiking or exercising for an hour or more, an electrolyte-containing sports drink like HYDRATech™ Instant is even better. My favorite non-water, non-alcohol beverage is Health-Ade Kombucha. A fermented tea drink, it contains probiotics that aid gut health, but it also can be used as a mixer for alcoholic drinks, so it serves a dual purpose on my vacations.
How To Stay Fit Without A Gym
For many people, the thing they miss most about being away from home is their gym. It can be hard to find a good one that has the equipment or atmosphere you want, and these days, you can’t predict if they’ll even be open when you want to go. The next best thing is to pack some light equipment to take with you. Bands, kettlebells, selectorized dumbbells, a suspension trainer, and/or weighted vest are all useful options to help you get in a workout anywhere.
Interestingly, the OtterBox Trooper LT 30 cooler I mentioned above can easily double as a weighted vest. It’s about seven pounds by itself, and is surprisingly comfortable when worn as a backpack; it won’t limit your mobility.
Of course, you always have your own bodyweight, which is more than enough to provide challenging workouts for the week or so that you’re away from the weights.
Simple bodyweight exercises include:
- Pushups (all variations)
- Plank, side plank, plank walks, inchworms
- Lunges (all variations), with added backpack resistance, if needed
- Stepups onto a table, cooler, stump, rock, etc.
- Pullups, on a beam, pipe, solid tree branch, etc.
To illustrate, check out these sample workouts that require just your bodyweight, light dumbbells, or bands.
Kettlebells and steel clubs can be easy to travel with too, and will expand your workout options. A 16-kilo bell/20-pound club if you’re a man, or 8kg bell/15-pound club if you’re a woman, don’t take up much space in a back seat, trunk, or flat bed, but they’ll provide a multitude of exercises that can keep you fit on the road. See our beginner’s kettlebell workout and steel club starters’ guide if you need inspiration.
Get more nutrition info from Chris Mohr at mohrresults.com.
)
